Step-by-Step Guide: Making Jerky with a Dehydrator
Table of Contents
Step-by-Step Guide: Making Jerky with a Dehydrator
Making your own homemade beef jerky is easier than you think. Skip the store-bought versions packed with preservatives and take control of your snacks. With the right ingredients and a dehydrator, you can craft flavorful strips that match your taste.
Why settle for mass-produced options when you can customize every bite? A sweet-savory marinade with soy sauce, Worcestershire sauce, and smoked paprika creates a perfect balance. Many enthusiasts praise this blend for its rich taste and adaptability.
The best part? The process is hands-off. Just marinate, arrange in your appliance, and let it work for about four hours. You’ll get tender, protein-packed results without the hassle.
Key Takeaways
- Homemade versions beat store-bought in flavor and freshness.
- Customize your marinade for a personalized taste.
- A mix of soy and Worcestershire sauce adds depth.
- Four hours in the appliance delivers perfect texture.
- Lean cuts of meat yield the best results.
Introduction to Homemade Beef Jerky
Discover the art of creating flavorful strips in your kitchen. This snack has deep roots, tracing back to the Quechua culture, where it was known as “Ch’arki.” Originally, it was a method to preserve meat for long journeys.
Today, store-bought options often rely on preservatives to extend shelf life. However, when you make beef jerky at home, you control the ingredients. Natural alternatives like sugar help retain moisture without artificial additives.
Homemade versions are not only healthier but also more cost-effective. While commercial brands can cost over $8 per ounce, preparing it yourself averages around $3 per pound. Plus, you can customize the flavors to suit your taste.
This snack is perfect for outdoor enthusiasts. Its high protein content makes it an ideal choice for hiking, camping, or any adventure. You’ll stay energized without the need for refrigeration.
Another advantage is its adaptability. Most recipes use pantry staples like soy sauce, Worcestershire sauce, and spices. This means you can experiment and create unique blends that match your preferences.
While homemade jerky lasts about three months, its freshness and flavor far surpass store-bought options. By skipping the preservatives, you get a cleaner, more satisfying snack.
Why Use a Dehydrator for Beef Jerky?
Achieve consistent results with a dehydrator’s precise temperature control. Unlike an oven, which often runs hotter, a dehydrator maintains a steady 145°F. This ensures even drying without overcooking.
Energy efficiency is another advantage. A dehydrator uses only 500W, while an oven consumes up to 2,500W. This makes it a more economical choice for long drying sessions.
Hands-off operation is a major perk. Many models, like the COSORI, come with automatic shutoff features. You can set it and forget it, saving you time and effort.
Airflow is another key benefit. Proper circulation prevents case hardening, ensuring your snacks dry evenly. This is harder to achieve with an oven, where heat distribution can be uneven.
Drying time varies slightly. A dehydrator typically takes 4-6 hours, while an oven might finish in 3-4 hours. However, the dehydrator’s consistency often leads to better results.
Lastly, following USDA guidelines is easier with a dehydrator. Its controlled environment ensures safe meat dehydration, giving you peace of mind.
Choosing the Right Cut of Beef
Selecting the right meat is the foundation of a great snack. The cut you choose impacts the texture, flavor, and overall quality of your final product. Lean cuts are ideal because they contain less fat, which helps preserve the meat and ensures even drying.
Lean Cuts for the Best Results
Not all cuts are created equal. For the best results, opt for lean options like eye of round, top sirloin, London broil, flank steak, and bottom round. These cuts are not only affordable but also provide the perfect balance of tenderness and flavor.
Here’s a quick comparison of popular cuts and their costs:
| Cut | Price per Pound |
|---|---|
| Eye of Round | $4.99 |
| Top Sirloin | $9.99 |
| London Broil | $6.99 |
| Flank Steak | $8.99 |
| Bottom Round | $5.99 |
Trimming and Slicing the Meat
Once you’ve chosen your cut, trim any excess fat to about 1/8 inch. This step prevents spoilage and ensures even drying. Next, slice the meat against the grain for a tender texture. Cutting with the grain can make the final product chewy.
For clean, even slices, sharpen your knife and aim for 1/4-inch thickness. If the meat is too soft, place it in the freezer for 1-2 hours to firm it up. This makes slicing easier without fully freezing the meat.
By starting with the right cut and preparing it properly, you’ll set yourself up for success. The effort you put into this step will pay off in the final product.
Creating the Perfect Beef Jerky Marinade
Crafting a flavorful marinade is the secret to a delicious snack. The right blend of ingredients enhances the natural taste while adding depth and complexity. A well-balanced marinade ensures every bite is packed with flavor.

Essential Ingredients for the Marinade
Start with a base of soy sauce and Worcestershire sauce. These two ingredients create a rich umami flavor. Add garlic powder and onion powder for a savory kick.
For sweetness, include sugar. A quarter cup of brown sugar per pound of meat works well. A pinch of pepper adds a subtle heat. For tenderizing, consider using a meat tenderizer with bromelain to break down proteins.
Mixing and Marinating the Beef
Combine all ingredients in a bowl. Use a 1:1 ratio of soy sauce to Worcestershire sauce. Stir until the sugar dissolves completely. This ensures even flavor distribution.
Place the meat in a ziplock bag and pour the marinade over it. Massage the bag gently to coat every piece. This technique ensures an even coating and better absorption.
Marinate for 12 to 36 hours. Avoid exceeding this time, as over-marinating can make the meat mushy. For best results, refrigerate during the process.
Experiment with flavor variations like honey-sriracha, coffee-rubbed, or teriyaki. These twists can add a unique touch to your snack.
Dehydrating the Beef Jerky
Transform your kitchen into a snack-making haven with this simple process. Proper dehydration ensures your strips are flavorful, safe, and long-lasting. With the right setup and monitoring, you’ll achieve professional-level results every time.
Setting Up Your Dehydrator
Start by preparing your trays. Use parchment paper or silicone mats to prevent sticking. Arrange the pieces in a single layer for even drying. This ensures consistent airflow and prevents overlapping.
For optimal results, stagger the trays when loading. This allows better circulation and reduces drying time. Set the temperature to at least 145°F, as recommended by the USDA for safe dehydration.
Monitoring the Drying Process
Check the strips every two hours. Blot any visible fat droplets with a paper towel to prevent spoilage. This step is crucial for maintaining quality and safety.
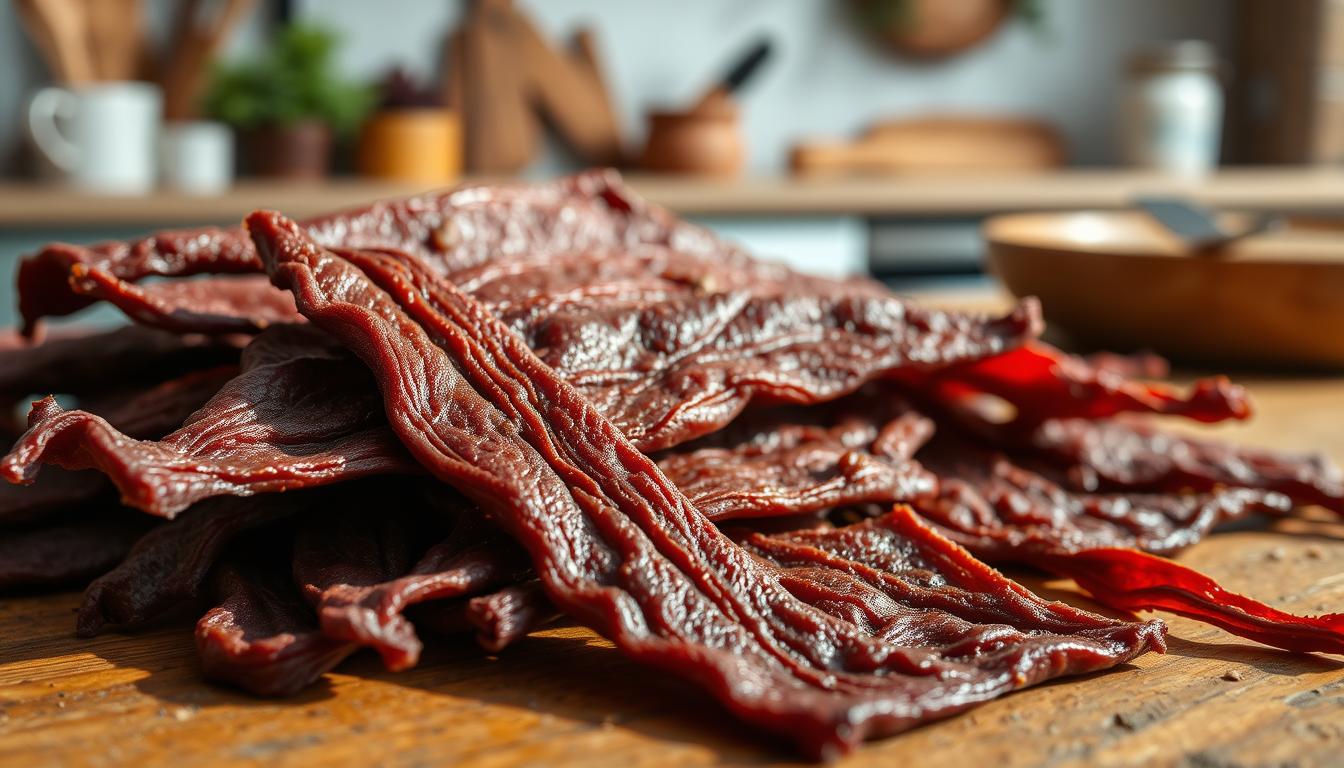
Test for doneness by bending a piece. It should bend without breaking and show white fibers. Here’s a visual timeline:
- 2 hours: Pliable and slightly moist.
- 4 hours: Leathery with a firm texture.
- 6 hours: Snappable and fully dried.
Once done, consider a post-dehydration treatment. Heat the strips in an oven at 275°F for 10 minutes to ensure safety. This step eliminates any remaining bacteria.
Storing Your Homemade Beef Jerky
Proper storage ensures your homemade snacks stay fresh and flavorful for weeks. Whether you’re planning to enjoy them soon or save them for later, the right techniques can make all the difference. Let’s explore the best ways to keep your creations in peak condition.

Short-Term Storage Solutions
For short-term storage, airtight containers are your best bet. Mason jars or resealable plastic bags work well to keep moisture and air out. This method preserves freshness for up to one month.
Place a silica gel packet inside the container to absorb excess moisture. These packets are widely available online or at container stores. They help maintain the ideal texture and prevent spoilage.
Store your snacks in a cool, dark place like a pantry or cupboard. Avoid areas with direct sunlight or heat, as they can degrade quality. For added safety, keep them in the fridge if you live in a warm climate.
Long-Term Storage Options
For extended storage, vacuum-sealed bags are the way to go. This method removes air, preventing oxidation and extending shelf life up to one year. It’s perfect for bulk preparation or saving snacks for future adventures.
If you don’t have a vacuum sealer, use DIY oxygen absorbers. Fill a small tea bag with uncooked rice and place it in the container. This simple trick helps reduce oxygen levels and prolong freshness.
Freezing is another excellent option for long-term storage. Place the snacks in a freezer-safe container or bag. They’ll stay fresh for up to six months. When ready to enjoy, thaw them at room temperature for a few hours.
| Storage Method | Shelf Life | Best For |
|---|---|---|
| Airtight Jars | 1 Month | Short-Term Use |
| Vacuum-Sealed Bags | 1 Year | Long-Term Storage |
| Freezer | 6 Months | Bulk Preservation |
By choosing the right storage method, you can enjoy your homemade snacks anytime. Whether you prefer short-term convenience or long-term preservation, these tips ensure your efforts pay off.
Tips for Making the Best Beef Jerky
Perfecting your snack starts with the right techniques. From tenderizing the meat to customizing the marinade, small adjustments can elevate your results. Let’s dive into the details to help you create a snack that’s both flavorful and satisfying.
Using a Meat Tenderizer
Start by preparing your cuts properly. Use a mallet to pound the meat to a uniform 1/8-inch thickness. This ensures even drying and a consistent texture. For a more tender result, consider using a tenderizer with papain or bromelain. These enzymes break down proteins, making the meat softer.
If you don’t have a tenderizer, try natural alternatives like kiwi puree or pineapple juice. These options work in a similar way and add a subtle flavor. Just be careful not to overdo it, as too much can make the meat mushy.
Adjusting the Marinade to Your Taste
Customizing your marinade is a great way to make your snack unique. Start with a base of soy sauce and Worcestershire sauce, then add spices like garlic powder and onion powder. For heat, adjust the pepper level based on your preference—from jalapeño to ghost pepper for a fiery kick.
Sweeteners can also be tailored to your taste. Swap sugar for maple syrup, agave, or monk fruit for a healthier twist. If you enjoy smoky flavors, try using chipotle powder or liquid smoke. These small tweaks can make a big difference in the final product.
When slicing the meat, always cut against the grain for a tender texture. This step ensures each bite is enjoyable and not overly chewy. With these tips, you’ll create a snack that’s perfectly suited to your palate.
Conclusion
Crafting your own snacks at home offers unmatched benefits. Not only do you save money—around $15 per pound compared to $35 for artisanal options—but you also control the ingredients and flavors. Experiment with different profiles to find your perfect blend.
Always prioritize food safety. Use proper storage methods and follow guidelines to ensure your creations stay fresh and safe. For a thoughtful touch, consider gifting your snacks in decorative mason jars. They make great presents for friends and family.
Ready to take it further? Explore smoking techniques or adapt your recipe for wild game. The possibilities are endless, and the results are always rewarding. Start your journey today and enjoy the satisfaction of making something truly unique.
FAQ
What’s the best cut of meat for homemade jerky?
How long should I marinate the meat?
Can I make jerky without a dehydrator?
How thin should I slice the meat?
How do I store jerky to keep it fresh?
What’s the ideal dehydrator temperature?
Can I adjust the marinade’s spice level?
Why is my jerky too tough?
For more cooking tips, stay connected with us. We also recommend the cookbook Skinnytaste Simple: Easy, Healthy Recipes with 7 Ingredients or Fewer
For more Recipes about Beef?