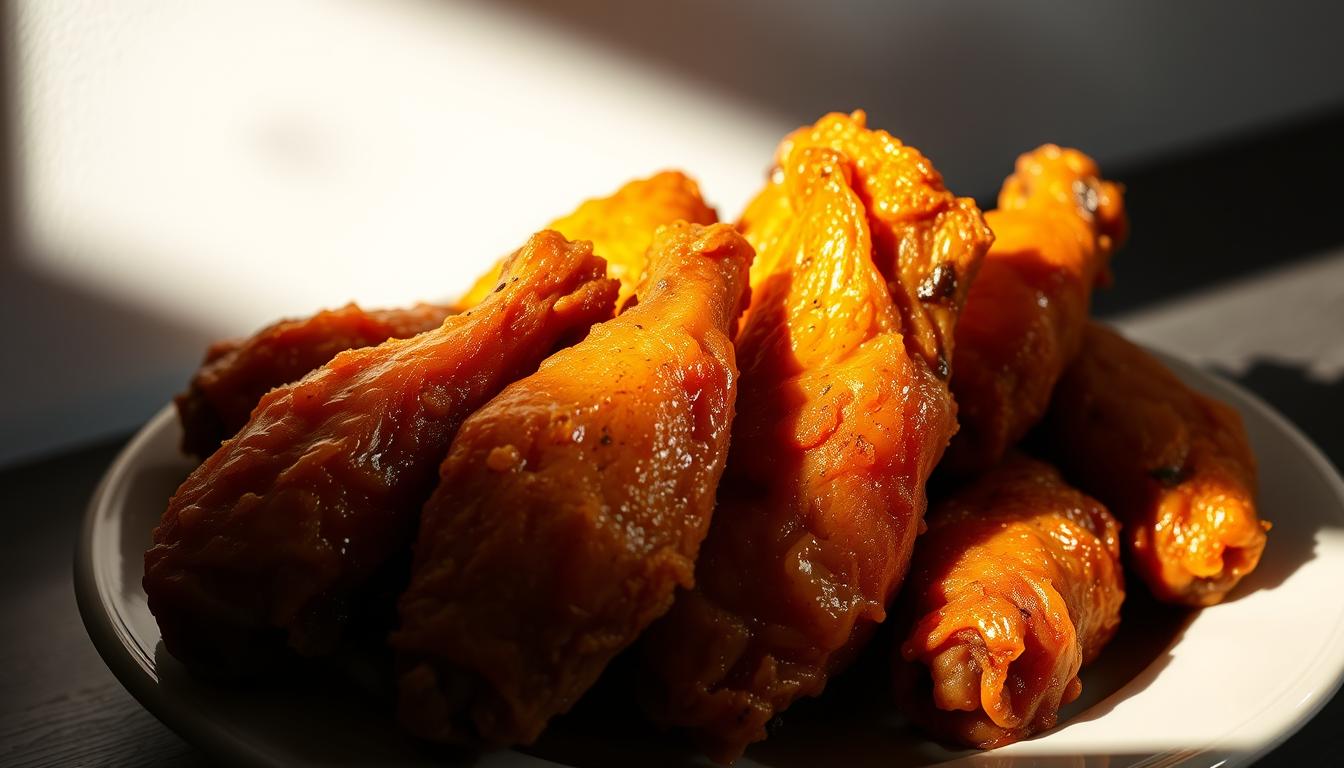
Air Fryer Wings: Perfectly Crispy Every Time
Table of Contents
Air Fryer Wings: Perfectly Crispy Every Time
Craving crispy, golden-brown chicken wings without the mess of deep frying? Your countertop appliance can deliver restaurant-quality results in under 30 minutes. These bites come out juicy inside with an irresistible crunch—no oil bath required.
Families love this method for its speed and versatility. Whether you’re hosting game day or need a quick weeknight meal, the appliance handles various flavors effortlessly. From classic buffalo to honey garlic, everyone gets their favorite.
Preheat to 400°F for optimal texture. No specialized equipment? A standard oven works too—just adjust the timing slightly. Either way, you’ll achieve that satisfying crispiness with minimal effort.
Key Takeaways
- Healthier than deep-fried versions with identical crunch
- Ready in 20-30 minutes for fast meals
- Kid-approved flavor options please picky eaters
- Ideal for gatherings or simple dinners
- 400°F ensures golden perfection
Why You’ll Love Air Fryer Wings
Skip the oil splatter—your countertop gadget makes perfect wings effortlessly. With 70% less fat than traditional deep-frying, you get the same crunch without guilt. A single tablespoon of oil replaces quarts, keeping meals light yet flavorful.
Speed is another win. At 400°F, they cook in 16–22 minutes—half the time of oven baking. No more waiting 45+ minutes for crispy results. Just toss them in the non-stick basket, and cleanup takes seconds.
Dietary needs? Covered. These wings are naturally gluten-free and low-carb without breading. Plus, popular models like Ninja and Cosori deliver consistent texture every time.
| Method | Cook Time | Oil Used | Cleanup |
|---|---|---|---|
| Air Fryer | 16–22 mins | 1 tbsp | Non-stick basket |
| Oven | 45+ mins | 2+ tbsp | Greasy pans |
Whether you’re meal-prepping or hosting friends, this method adapts. From buffalo to garlic-parmesan, your air fryer recipes just got a major upgrade.
Essential Ingredients for Crispy Wings
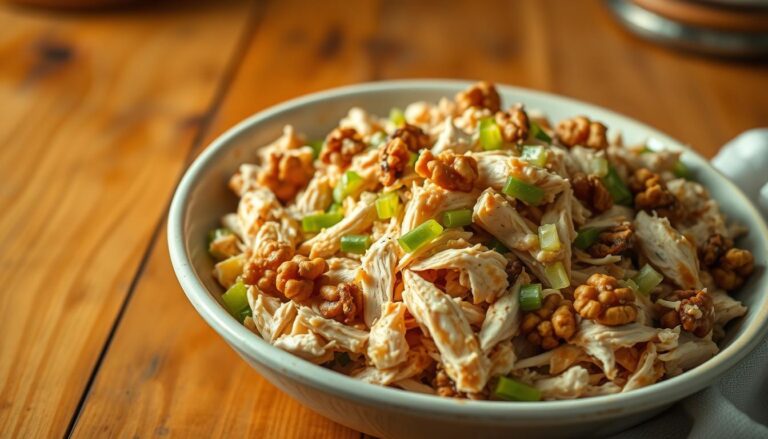
Quality components transform ordinary chicken into golden, crunchy bites. Whether you prefer drumettes or flats, each piece requires careful prep for maximum crispiness. Let’s break down what you’ll need.
Chicken Wings: Fresh or Frozen?
Fresh cuts yield superior texture. Ice crystals in frozen varieties can make skin rubbery. If using frozen, thaw completely in the fridge first—pat dry twice to remove excess moisture.
Understand your cuts:
- Drumettes: Meatier upper arm portion
- Flats: Two-bone middle section with perfect sauce-holding ridges
- Tips: Often discarded but great for stock
The Secret to Crispy Skin: Baking Powder
This pantry staple works magic. The alkaline nature raises skin’s pH, accelerating the Maillard reaction—that’s the chemical process behind browning and crispiness.
Use 2 teaspoons per 20 pieces. Combine with salt before tossing—never substitute baking soda, which tastes bitter.
Must-Have Seasonings
Build flavor layers with these essentials:
- Garlic powder: Adds umami depth
- Smoked paprika for color and subtle heat
- Onion powder for savory sweetness
- Kosher salt (fine grains adhere better)
Optional upgrades: Try dried thyme for earthiness or sage for peppery notes. Always season generously—the crisp exterior needs bold flavor support.
How to Prep Your Wings
Proper prep work makes the difference between soggy and crispy results. Focus on moisture control and flavor layering for bites that crackle with texture.
Patting Dry: The First Step to Crispiness
Paper towels are your best tool here. Press firmly on each piece to absorb surface moisture—this prevents steaming and ensures even browning. For extra insurance, let them air-dry on a rack for 10 minutes after patting dry.
| Method | Effectiveness | Time Required |
|---|---|---|
| Paper Towels | High (removes 90% moisture) | 2 minutes |
| Air-Drying | Very High (evaporates residual dampness) | 10+ minutes |
Seasoning Techniques for Maximum Flavor
Toss pieces in a large bowl with 1 tbsp oil—it helps spices stick. Stainless steel distributes seasoning evenly. For depth, marinate 30+ minutes.
Pro tips:
- Mix dry rubs before adding to avoid clumping
- Apply salt last to prevent moisture loss
- Use a zip-top bag for mess-free marinating
Air Fryer Wings Step-by-Step
Mastering crispy chicken starts with precise temperature control and timing. Follow these steps for golden, crackling results every time.
Setting the Right Temperature
Preheat to 400°F for optimal texture. Some brands debate preheating—Ninja recommends it, while Instant Pot claims cold starts work. For consistency, preheating ensures even heat distribution.

Cook Time and Shaking the Basket
Cook for 16–22 minutes, shaking the air fryer basket halfway. This prevents sticking and promotes uniform crisping. For larger batches, adjust times:
| Basket Capacity | Cook Time |
|---|---|
| 3-qt | 18–22 minutes |
| 6-qt | 16–20 minutes |
Tip: Use oils with high smoke points (avocado or peanut) to avoid burning at 400°F.
Testing for Doneness
Check for an internal temperature of 165°F using a meat thermometer. Visual cues include golden-brown skin and rendered fat pooling. Let rest 2–3 minutes before saucing to preserve crispiness.
5 Flavor Variations to Try
Transform plain chicken into flavor-packed favorites with these five crowd-pleasing variations. Each recipe balances texture and taste, from fiery to tangy. Perfect for game day or weeknight dinners.
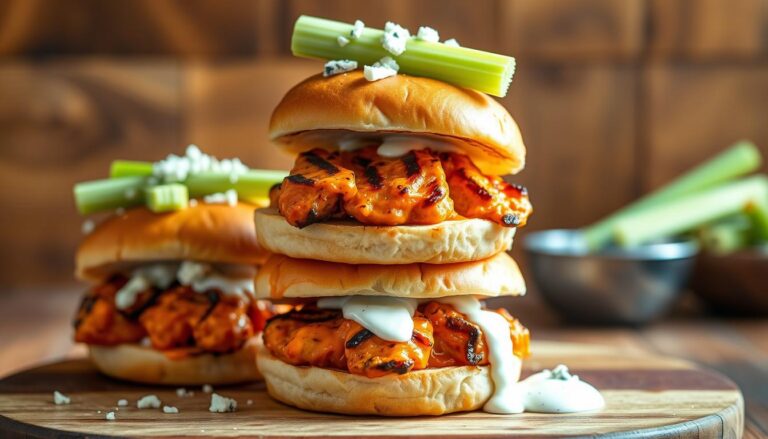
Classic Buffalo Sauce
Mix 3 parts Frank’s RedHot to 1 part melted butter for balanced heat. Toss cooked pieces immediately—the sauce clings best when hot. Serve with celery sticks and blue cheese dressing.
Garlic Parmesan
Fresh minced garlic adds punch, but powder works for quicker prep. Combine with grated Parmesan, parsley, and a drizzle of olive oil. Bake at 400°F for 2 minutes to melt the cheese.
Honey Sriracha Glaze
Whisk 2 tbsp honey, 1 tbsp sriracha, and 1 tsp lime juice. Brush on during the last 3 minutes of cooking. The lime cuts sweetness, adding complexity.
Lemon Pepper
Wet rubs (lemon zest + cracked pepper) infuse more flavor than dry blends. For extra zest, spritz with fresh lemon juice post-cooking. Avoid bottled juice—it lacks brightness.
BBQ or Cajun Spice
Slap Ya Mama seasoning delivers instant depth, or make your own with paprika, cayenne, and thyme. For BBQ, brush sauce sparingly to keep the skin crisp.
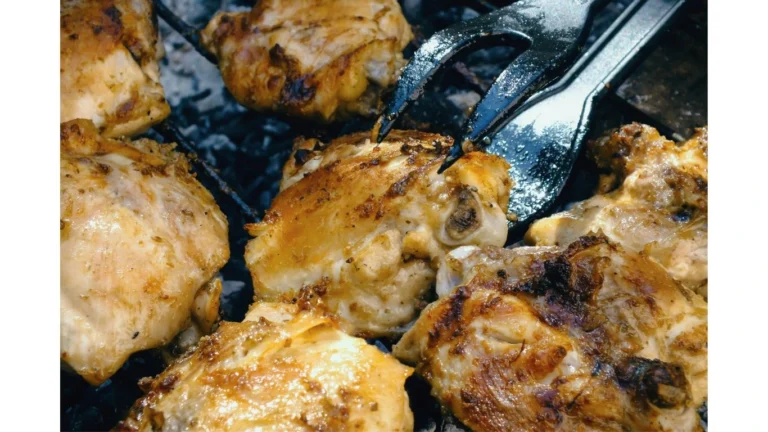
Oven Method for Air Fryer Wings
No air fryer? Your oven can still deliver crispy results with the right technique. Preheat to 425°F and use a wire rack—this lets heat circulate evenly for golden skin.

Flip pieces halfway through the 45-minute cook time. Unlike parchment paper, a rack prevents steaming and boosts crunch. For extra crispiness, broil for 2–3 minutes at the end.
| Method | Cook Time | Texture |
|---|---|---|
| Convection Bake | 40 minutes | Extra crispy (fan-assisted) |
| Traditional Oven | 45–50 minutes | Even browning (manual flip) |
Reduce salt in dry rubs since longer cooking intensifies flavors. A broiler finish mimics the rapid heat of countertop gadgets. Expect a 25% longer cooking time compared to faster appliances.
This way works for large batches or when hosting crowds. Just space pieces evenly—overcrowding leads to uneven results. Crispy oven-baked wings are within reach!
Serving Suggestions
Elevate your game-day spread with perfect pairings for crispy chicken. The right combinations enhance texture and flavor while keeping meals balanced. From tangy sauces to crunchy veggies, these ideas complete your plate.
Dips and Sauces
Classic ranch dressing remains a crowd favorite, but don’t stop there. Blue cheese crumbles with celery sticks offer a sharp contrast to spicy bites. For sugar-conscious options, try sugar-free BBQ sauce or Greek yogurt-based tzatziki.
| Dip Type | Best Pairing | Prep Time |
|---|---|---|
| Honey Mustard | Sweet & spicy rubs | 2 minutes |
| Sriracha Mayo | Garlic-parmesan | 3 minutes |
| Alabama White Sauce | Smoked paprika wings | 5 minutes |
Unique recipes like whipped feta or mango habanero add global flair. Serve small bowls for easy sharing—this way, guests can mix flavors.
Side Pairings
Crunchy side dishes balance rich flavors. Jicama fries or carrot sticks add freshness without carbs. For heartier options, loaded potato skins or cornbread muffins soak up extra sauce.
Beverages matter too. A citrusy IPA cuts through heat, while lime margaritas refresh palates. Plan 2-3 options to suit all tastes.
Storing and Reheating Leftovers
Leftovers don’t have to lose their crunch—learn the best preservation methods. Proper storage keeps bites crispy and safe to eat for days. Follow these steps to maintain flavor and texture.
Refrigerator vs. Freezer
Store cooked pieces in an airtight container for up to 4 days in the fridge. Glass containers retain less moisture than plastic, preventing sogginess. For longer storage, freeze in single layers separated by parchment paper.
Pro tip: Remove excess fat before freezing to avoid flavor changes. Sauces may separate when frozen—stir well after thawing.
Reheating for Best Texture
Skip the microwave (it steams skin) and use your countertop appliance at 360°F for 4 minutes. This restores crispiness without drying meat. For frozen pieces, thaw overnight in the fridge first.
- Air fryer: 360°F, 4–5 minutes (stir halfway)
- Oven: 375°F on a rack for 8–10 minutes
- Microwave: Last resort—30-second bursts with parchment under pieces
Always check internal temperature reaches 165°F. Serve immediately for peak crunch.
Troubleshooting Common Issues
Even the best recipes can hit snags—here’s how to fix common texture problems. Whether your bites turn out rubbery or unevenly cooked, small adjustments restore perfection.
Why Aren’t My Bites Crispy?
Moisture is the enemy of crunch. Check these culprits:
- Thawing errors: Ice crystals create steam. Pat pieces dry twice after thawing.
- Sauce timing: Adding glaze too early softens skin. Toss only after cooking.
- Humidity: High moisture in your kitchen? Extend cook time by 5 minutes.
“Crispiness fails when heat can’t reach all surfaces evenly. Space is non-negotiable.”
Avoiding Overcrowding the Basket
A single-layer is mandatory. Stacked pieces steam instead of crisp. For full baskets:
| Appliance Size | Max Pieces (Single Layer) | Time Adjustment |
|---|---|---|
| 3-qt | 8–10 | +10 minutes |
| 6-qt | 12–15 | +8 minutes |
Pro hack: Stand drumettes upright to fit more without touching. Rotate halfway for even browning.
For parties, batch-cooking works best. Keep cooked pieces warm in a 200°F oven while finishing later batches. This ensures every serving stays crispy.
Nutritional Benefits of Air Fryer Wings
Smart cooking methods unlock better macros without sacrificing flavor. Compared to deep-fried versions, your countertop gadget cuts fat by nearly 50%—just 36g per serving versus 70g. That’s 270 calories for five pieces, with most coming from high-quality protein.
Dark meat provides complete amino acids for muscle repair. The skin adds collagen and micronutrients—think vitamin A for immunity and iron for energy. Unlike lean cuts, it retains juiciness even at high heat.
Watch your sodium intake with sauces. Homemade buffalo blends average 400mg less cholesterol than bottled versions. For keto or Paleo diets, skip breading and use avocado oil sprays.
“Chicken skin contains oleic acid, the same heart-healthy fat found in olive oil—when crisped properly.”
Balance is key. Pair with celery sticks or jicama fries to add fiber. This way, you get crunch and nutrition in every bite.
Conclusion
Golden, crunchy bites are just minutes away with this foolproof method. Remember the key steps: pat dry, use baking powder, and cook at 400°F for perfect texture every time.
Don’t stop at classic flavors—try global twists like teriyaki or jerk seasoning. This easy method also works for meal prep. Cook a batch on Sunday for quick lunches all week.
Pro tip: Parchment liners make cleanup a breeze. Now that you’ve mastered this recipe, share your creations! Rate it online or tag us on social media.
FAQ
Can I use frozen chicken for this recipe?
Why add baking powder to the seasoning?
How long should I cook them at 400°F?
What’s the best way to test for doneness?
Can I make these in a conventional oven?
How do I store leftovers?
What’s the trick to reheating without sogginess?
Which sauce pairs best with garlic parmesan wings?
Why did my wings turn out chewy?
Are these healthier than deep-fried versions?
For more cooking tips, stay connected with us. We also recommend the cookbook Skinnytaste Simple: Easy, Healthy Recipes with 7 Ingredients or Fewer
For more Recipes about Chicken