How to make jerky in a dehydrator : Perfect Homemade Beef
Table of Contents
How to make jerky in a dehydrator : Perfect Homemade Beef
Craving a snack that’s both flavorful and healthy? Homemade beef jerky is a game-changer. Unlike store-bought versions, you control the ingredients, ensuring a fresher, tastier result. With a few simple steps, you can create a beef jerky that’s rich in flavor and free from unnecessary additives.
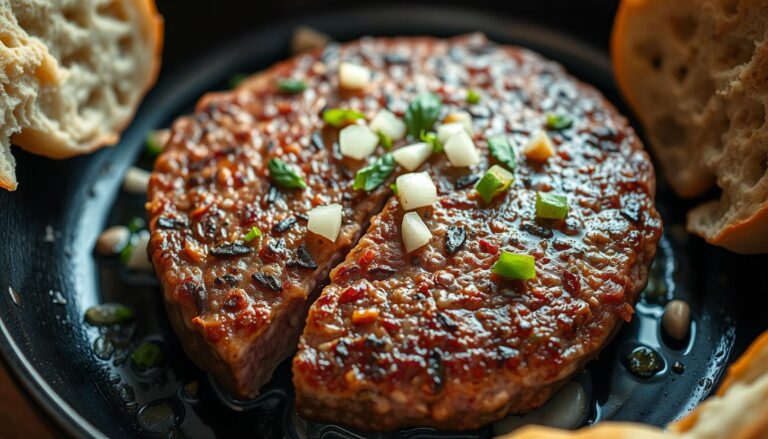
Start with lean cuts of beef, like round steak, for the best texture. A marinade of soy sauce, Worcestershire, liquid smoke, and brown sugar adds depth to the flavor. Let the meat soak for at least eight hours to absorb all the goodness. Then, pound it thin and use a dehydrator to achieve the perfect chewiness.
One enthusiast, Wendy James Ashworth, calls it her “new favorite snack.” Homemade jerky also lasts up to three months, making it a practical choice for on-the-go nutrition. Ready to elevate your snacking game? Let’s dive into the details.
Key Takeaways
- Homemade jerky offers superior flavor and ingredient control.
- Lean beef cuts, like round steak, work best for texture.
- A marinade enhances flavor with soy sauce and Worcestershire.
- Using a dehydrator ensures the perfect chewiness.
- Homemade jerky can last up to three months.
Introduction to Homemade Beef Jerky
Discover the rich history behind your favorite protein-packed snack. Beef jerky traces its roots to the Quechua word “Ch’arki,” meaning dried, salted meat. This ancient preservation method has evolved into a modern-day favorite, offering both flavor and convenience.
Today, homemade beef jerky is crafted using lean cuts of meat and modern tools like dehydrators. These devices ensure consistent heat and airflow, reducing the risk of bacterial growth. Lean cuts, combined with salt, further extend shelf life by minimizing fat content.
Jerky has long been valued as a portable protein source. Its cultural significance spans centuries, from indigenous tribes to modern adventurers. Whether you prefer smoky pepper or tangy teriyaki, the recipe’s versatility allows for endless flavor variations.
Below is a comparison of traditional vs. modern jerky-making methods:
| Aspect | Traditional | Modern |
|---|---|---|
| Tools | Sun drying, smoking | Dehydrators, ovens |
| Safety | Higher risk of spoilage | Controlled heat reduces bacteria |
| Flavor | Limited variations | Endless customization |
By understanding its origins and modern techniques, you can appreciate the art of creating beef jerky at home. Ready to explore the process? Let’s dive deeper into choosing the right cut of meat.
Choosing the Right Cut of Beef
Selecting the perfect beef cut is the foundation of great homemade beef jerky. The right choice ensures your jerky is flavorful, tender, and long-lasting. Lean cuts like round steak, sirloin, and flank are ideal because they contain less fat, which is crucial for texture and shelf life.
Fat plays a significant role in spoilage and chewiness. Marbled cuts may seem appealing, but they can lead to quicker spoilage and a less desirable texture. Trimming excess fat before slicing is essential. Freezing the meat for about an hour before slicing also makes it easier to achieve thin, even cuts.
Why Lean Cuts Matter
Lean cuts like round steak are not only cost-effective but also provide the perfect balance of flavor and texture. While pricier options like sirloin or flank can work, they may not offer the same value for large batches. Butchers often recommend slicing against the grain for maximum tenderness.
Here are some tips to keep in mind:
- Choose cuts with minimal fat for better longevity.
- Freeze the meat briefly to simplify slicing.
- Ask your butcher for grain direction to ensure tenderness.
- Double the recipe for efficiency, as suggested by jerky enthusiast Cheri.
- Follow USDA guidelines to avoid fatty trimmings that can spoil quickly.
By starting with the right beef cut, you set the stage for a delicious and durable snack. Whether you’re a beginner or a seasoned pro, these tips will help you create jerky that’s both satisfying and practical.
Preparing the Beef for Jerky
Mastering the preparation of beef is essential for perfect jerky. Start by selecting lean cuts like round steak or sirloin. These cuts ensure a tender texture and longer shelf life. Once you have your cut beef, the next step is slicing it correctly.
For uniform slices, wrap the meat in plastic wrap and place it in the freezer for about an hour. This firms up the meat, making it easier to cut. Aim for a thickness of 1/8″ to 1/4″. Use a ruler or deli slicer for precision.
Tips for Slicing Beef
Slice against the grain for tender jerky or with the grain for a chewier texture. Uniform thickness ensures even drying, so take your time. After slicing, pat the sheets of beef dry with paper towels. This removes excess moisture and prevents marinade dilution.
- Sanitize surfaces and tools after handling raw meat to avoid contamination.
- Use a meat mallet to achieve consistent thinness if needed.
- Double-check thickness with a ruler for best results.
By following these steps, you’ll prepare beef that’s ready to absorb flavors and dry evenly. Proper preparation is the foundation of great jerky.
Creating the Perfect Jerky Marinade
The secret to unforgettable beef jerky lies in its marinade. A great marinade balances sweet, salty, and tangy flavors while enhancing the meat’s natural richness. Start with a base of soy sauce, Worcestershire sauce, and liquid smoke. Add brown sugar for a touch of sweetness and caramelization during dehydration.

Spices like garlic powder, onion powder, and pepper add depth and complexity. For a gluten-free option, swap soy sauce with coconut aminos. “The marinade is where the magic happens,” says jerky enthusiast Jeremiah Tyson, who adds habanero flakes for a spicy kick.
Marinade Ingredients
Each ingredient plays a specific role. Soy sauce provides umami and saltiness, while Worcestershire adds tang. Brown sugar not only sweetens but also aids in caramelization, giving your jerky a glossy finish. Garlic and onion powders infuse savory notes, and pepper adds a subtle heat.
For those who love experimenting, optional additions like honey, red pepper, or habanero flakes can create unique flavor profiles. Marinate the beef for 4 to 24 hours to allow the flavors to penetrate deeply.
- Use ziplock bags for easy marinating and cleanup.
- Glass dishes are a reusable alternative for eco-conscious cooks.
- Pat the meat dry before dehydration to ensure even drying.
With the right marinade, your beef jerky will be bursting with flavor and ready to impress. Whether you stick to the classics or explore bold variations, the marinade is your canvas for creativity.
How to Make Jerky in a Dehydrator
Achieving the perfect texture for your snack requires precise drying techniques. Using a dehydrator ensures consistent results, making it an essential tool for homemade beef jerky. Proper setup and monitoring are key to success.
Setting Up Your Dehydrator
Start by arranging the pieces of beef in a single layer on the trays. Ensure there’s enough space between each piece for proper airflow. Models like Excalibur offer more tray space, while circular units are compact and efficient.
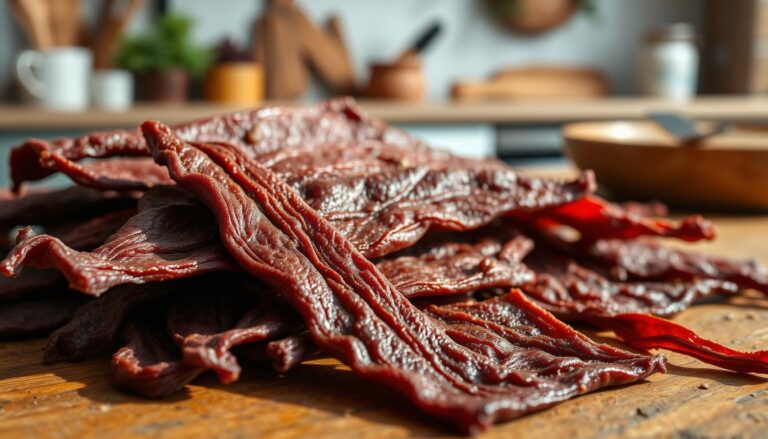
Set the temperature between 155°F and 160°F. This range ensures safe drying while preserving flavor. Rotate the trays halfway through the process for even results. Most batches take 4 to 6 hours, depending on thickness.
Checking for Doneness
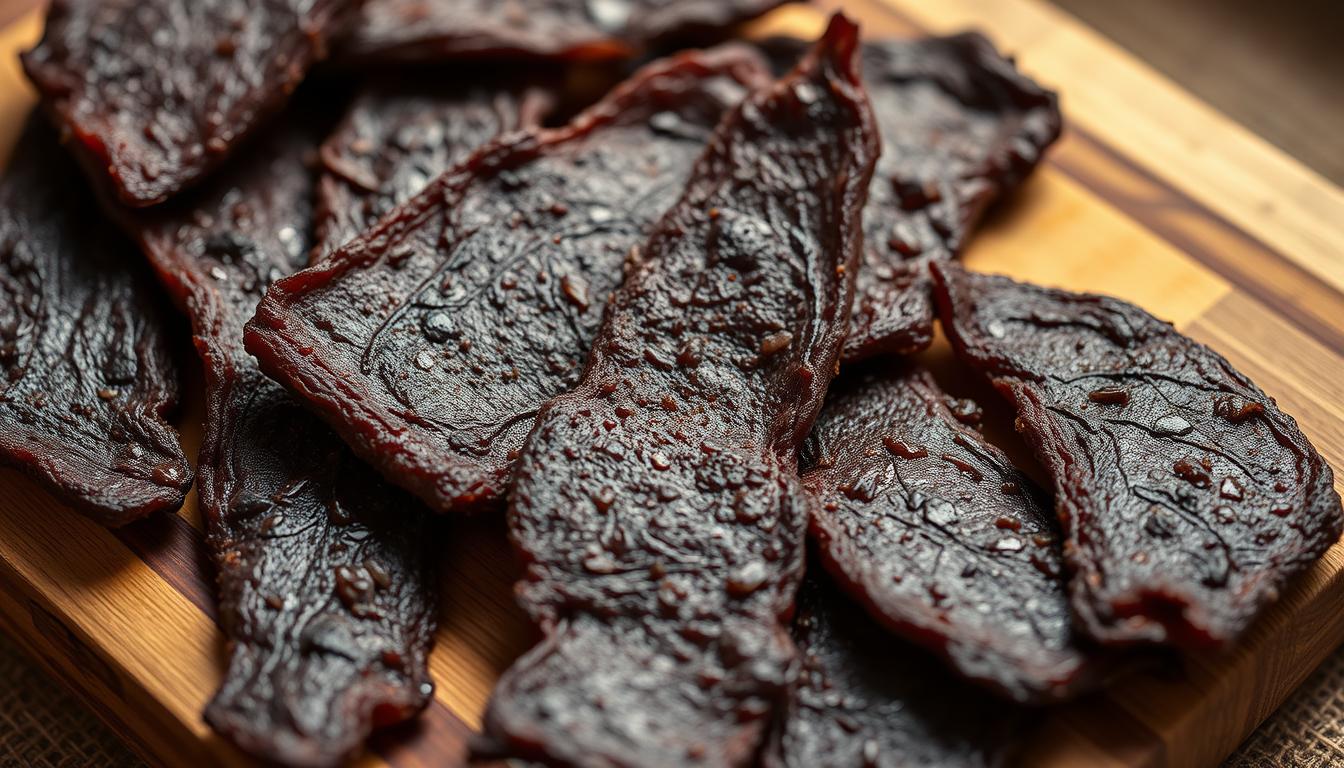
Monitor the jerky closely after 4 hours. Look for a darkening color and a leathery texture. To test doneness, bend a piece until it cracks but doesn’t break. This indicates the perfect balance of chewiness and dryness.
For added crispness, finish the jerky in the oven at 275°F for 10 minutes. This step is optional but enhances texture. Store your finished jerky in airtight containers for maximum freshness.
Optional Finishing Touches
Adding a final touch to your beef jerky can elevate its texture and flavor. While a dehydrator does most of the work, an oven finish can enhance crispness and remove excess fat. This step is optional but highly recommended for those seeking a polished result.
Oven Finishing Tips
After dehydrating, place the pieces on aluminum foil-lined sheets. Bake at 275°F for 10-12 minutes. This process removes surface fat and adds a slight crispness to the edges. Pat the jerky with paper towels afterward to absorb any remaining oils.
Be cautious with heat settings. High temperatures can cause burning, ruining the texture. For even air circulation, use cooling racks during the baking process. Jerky enthusiast Laura insists, “An oven finish is a mandatory step for that perfect crunch.”
- Enhances texture with crisp edges.
- Removes excess fat for better shelf life.
- Prevents burning by using moderate heat.
- Ensures even drying with cooling racks.
- Adds a professional touch to your homemade snack.
Storing Your Homemade Beef Jerky
Proper storage ensures your beef jerky stays fresh and flavorful. Whether you’ve made a large batch or just a few pieces, knowing how to store it correctly is essential. The right techniques can extend its shelf life while maintaining its quality.
For short-term storage, keep your jerky in airtight containers at room temperature. This method works well for up to one month. If you prefer longer storage, the fridge can preserve it for up to three months. For the ultimate longevity, vacuum-sealed bags in the freezer can keep it fresh for up to a year.
Storage Tips
Choosing the right container matters. Mason jars are great for smaller batches, while vacuum-sealed bags are ideal for freezing. Both options prevent moisture exposure, which can lead to spoilage. Signs of spoilage include mold, off smells, or a slimy texture.
- Use silica gel packs to control humidity in your storage containers.
- Refrigeration may slightly soften the texture due to moisture regain.
- Label containers with dates to track freshness.
“Enjoy within three months for the best flavor,” recommends jerky enthusiast Laura.
By following these tips, you’ll ensure your homemade jerky remains a delicious and convenient snack for weeks or even months.
Experimenting with Flavors
Unlock endless possibilities by experimenting with unique flavors for your snack. From sweet teriyaki to bold smoky pepper, the options are limitless. Customizing your recipes allows you to create a snack that suits your taste perfectly.

Flavor Variations
For a sweet twist, try a teriyaki version with sesame oil, rice vinegar, and ginger. This combination adds a rich, umami flavor with a hint of sweetness. If you prefer something bolder, a smoky pepper blend with cracked pepper and liquid smoke delivers a robust taste.
Spice blends like Cajun, chili lime, or coffee rub can add depth and complexity. Andrea Lagana suggests adding sesame seeds for an extra layer of texture. Vegetarian alternatives, such as mushroom or tofu jerky, offer a unique twist for those seeking plant-based options.
- Contrast sweet teriyaki with bold smoky pepper profiles.
- Experiment with spice blends like Cajun or chili lime.
- Add sesame seeds for a crunchy texture.
- Try vegetarian alternatives like mushroom or tofu jerky.
- Keep a flavor journal to track your favorite combinations.
Encourage your creativity by mixing and matching ingredients. Whether you stick to classic recipes or explore new ground, the key is to have fun and enjoy the process.
Conclusion
Crafting your own protein-packed snack at home brings unmatched satisfaction. Homemade beef jerky offers cost savings, flavor control, and a preservative-free option. It’s perfect for gifts, hiking trips, or everyday snacking.
Recap the key steps: slice lean cuts, marinate for depth, and use a dehydrator for consistent results. Unlike store brands, your recipe skips additives like MSG, ensuring a healthier choice.
Share your creations online or at gatherings to inspire others. If you enjoy this snack, explore related treats like candied cashews or bacon-wrapped poppers. Your home kitchen is the ultimate playground for culinary creativity.
Ready to elevate your snacking game? Your dehydrator awaits—transform that beef today!
FAQ
What’s the best cut of beef for homemade jerky?
How thin should I slice the beef?
What’s a simple marinade recipe for beef jerky?
How long should I marinate the beef?
What’s the ideal dehydrator temperature for beef jerky?
How do I know when the jerky is done?
Can I use an oven instead of a dehydrator?
How should I store homemade beef jerky?
Can I experiment with different flavors?
Can I use ground beef for jerky?
For more cooking tips, stay connected with us. We also recommend the cookbook Skinnytaste Simple: Easy, Healthy Recipes with 7 Ingredients or Fewer
For more Recipes about Beef?