Longhorn Chicken: A Delicious Poultry Delight
Table of Contents
Longhorn Chicken: A Delicious Poultry Delight
Craving a restaurant-quality meal at home? The Parmesan Crusted Chicken from Longhorn Steakhouse is a fan-favorite dish worth recreating. With its juicy marinated poultry, creamy cheese blend, and crispy panko topping, this recipe delivers bold flavors in every bite.
Whether you prefer skillet-searing, oven-baking, or grilling, this versatile dish adapts to your cooking style. Trusted sources like The Cozy Cook and The Country Cook have perfected their own versions, proving how achievable it is to make at home.
Using simple ingredients like provolone and ranch dressing, you can whip up a copycat recipe that rivals the original. Perfect for a quick dinner, this dish brings the steakhouse experience to your kitchen.
Key Takeaways
- Recreate Longhorn’s famous Parmesan Crusted Chicken at home.
- Versatile cooking methods: skillet, oven, or grill.
- Features a crispy panko and creamy cheese topping.
- Uses common ingredients like provolone and ranch.
- Tested by popular recipe sites for reliable results.
How to Cook Longhorn Chicken to Perfection
Skip the guesswork with these foolproof cooking methods. Whether you prefer a crispy sear, even baking, or smoky grill marks, each technique delivers juicy, flavorful results.

Skillet Searing
For a golden crust, use a cast iron skillet on medium-high heat. Cook chicken breasts 4-5 minutes per side. Add 2 tbsp water to prevent drying if finishing in the oven.
Pro tip: Use the same skillet to broil the cheese topping for layered flavor.
Oven Baking
Preheat your oven to 425°F. Place breasts in a dish with 2 tbsp water and bake 15-18 minutes. Verify doneness with a meat thermometer (165°F internal temp).
Warning: Watch closely during broiling—the cheese browns fast!
Grilling Option
Heat the grill to medium. Cook 4-7 minutes per side without flipping too soon. Prep toppings while the poultry cooks to save time.
Always rest meat 5 minutes before serving for juicier results.
Gathering Your Ingredients
The secret to perfect Parmesan Crusted Chicken lies in quality ingredients. Fresh components elevate flavors, so avoid shortcuts. Organize your shopping list by recipe section—marinade first, then crust.

For the Chicken and Marinade
Start with boneless, skinless breasts for even cooking. The marinade blends tangy and creamy notes:
- Olive oil – Base for moisture and richness.
- Ranch dressing – Adds herbaceous depth.
- Worcestershire sauce – Umami booster.
- Vinegar – Tenderizes the meat.
Pro tip: Use full-fat ranch for best texture. Low-fat versions may split when heated.
For the Parmesan Crust
The crispy topping combines cheeses and crunch. Opt for freshly grated parmesan (like BelGioioso) for better melt. Pre-shredded bags contain anti-caking agents.
| Ingredient | Amount (4 servings) | Substitutes |
|---|---|---|
| Provolone | 4 slices | Swiss or mozzarella |
| Panko breadcrumbs | 1/2 cup | Regular breadcrumbs |
| Garlic powder | 1 tsp | Fresh minced garlic |
Store leftover panko in an airtight container to prevent staleness. Grated cheese freezes well for future use.
Preparing the Marinade
Transform your poultry into a flavor-packed masterpiece with the right marinade. This step ensures juicy, tender results and locks in bold tastes. Follow these techniques to elevate your dish.
Mixing the Marinade
Combine olive oil, ranch dressing, Worcestershire sauce, and vinegar in a bowl. Whisk until emulsified—this blends fats and acids evenly. For a shortcut, swap with 1 cup Italian dressing.
Pro tip: Freshly grated parmesan melts better than pre-shredded. Avoid low-fat ranch; it may separate when heated.
Marinating the Chicken
Pound breasts to ½” thickness for even absorption. Submerge in marinade for at least 30 minutes (or overnight for deeper flavor). Use gallon bags for easy flipping or glass bowls for easy cleanup.
- Food safety: Always marinate in the fridge, not at room temperature.
- Overly acidic? Add a teaspoon of honey to balance tanginess.
Pat meat dry before cooking to ensure a crisp crust. Reserve used marinade? Boil it first to kill bacteria if basting.
Cooking Methods for Longhorn Chicken
Different cooking techniques bring out unique textures and flavors in your meal. Whether you prefer a crispy crust, tender bake, or smoky char, each method ensures juicy results. Below, explore three foolproof ways to prepare your dish.
Skillet Searing for a Golden Crust
A cast iron skillet locks in heat for even cooking. Sear chicken breasts 4–5 minutes per side on medium-high. Add 2 tbsp water if finishing in the oven to retain moisture.
Pro tip: Use the pan’s fond (browned bits) to make a quick sauce. Deglaze with broth or wine after removing the poultry.
Oven Baking for Hands-Off Ease
Preheat your oven to 425°F. Use a 9×13-inch dish for even heat distribution. Bake for 15–18 minutes until the internal temperature hits 165°F.
Visual cue: Juices should run clear, not pink. Rest 5 minutes before adding toppings to keep juices intact.
Grilling for Smoky Flavor
Heat the grill to medium (375–400°F). Cook 4–7 minutes per side, flipping only once. Avoid pressing the meat—this squeezes out moisture.
For picture-perfect grill marks, rotate breasts 45° halfway through cooking.
| Method | Best For | Time | Key Tip |
|---|---|---|---|
| Skillet | Crispy crust | 8–10 mins | Deglaze for sauce |
| Oven | Even cooking | 15–18 mins | Use a meat thermometer |
| Grill | Smoky flavor | 8–14 mins | Rotate for marks |
Warning: Multi-cookers (like air fryers) may dry out the dish. Stick to traditional methods for best results.
Creating the Parmesan Crust Topping
A well-crafted cheese and breadcrumb blend elevates every bite. The perfect balance of melt and crunch transforms simple poultry into a showstopper. Follow these steps for a flawless finish.
Melting the Cheese Mixture
For smooth melting, use a microwave or double boiler. Heat in 15-second intervals, stirring between each, to avoid clumping. Low heat is key—overheating causes separation.
Pro tip: A double boiler offers more control. Place a heatproof bowl over simmering water for gentle, even melting.
- Keto option: Replace panko with crushed pork rinds (1:1 ratio).
- Herb variation: Mix in 1 tsp dried basil or oregano for extra flavor.
| Method | Time | Best For |
|---|---|---|
| Microwave | 30-45 sec | Quick prep |
| Double Boiler | 2-3 mins | Precision melting |
Adding the Crispy Topping
Toast panko breadcrumbs in a dry skillet for 2 minutes. This enhances crunch and prevents sogginess. Combine with melted cheese, butter, and garlic powder for richness.
“Press the topping gently onto the meat—this ensures adhesion without crushing the crust.”
Make-ahead tip: Prep the cheese mixture up to 2 days ahead. Store covered in the fridge and reheat before use.
For crispness that lasts, broil for 1-2 minutes after baking. Watch closely to avoid burning.
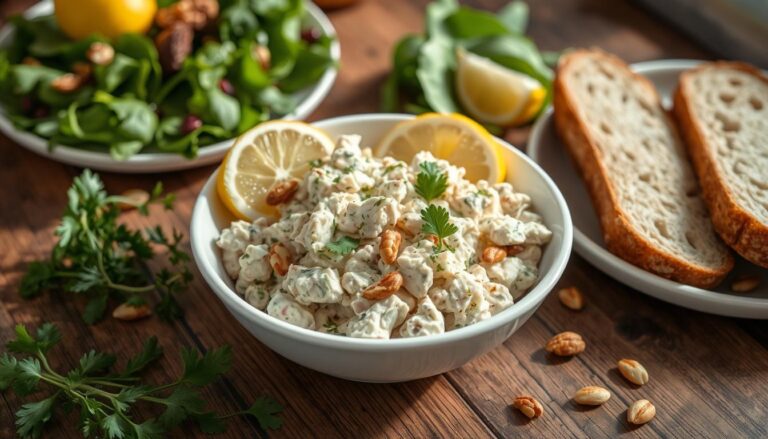
Serving Suggestions and Pairings
Complete your meal with perfectly paired sides that enhance every bite. The right accompaniments balance flavors and textures while complementing your main dish. Whether you prefer traditional comfort foods or lighter options, these combinations create a restaurant-worthy experience.
Classic Steakhouse Sides
Recreate the full restaurant experience with these signature pairings. Creamy mashed potatoes absorb the dish’s flavors beautifully. For color contrast, add garlic sautéed green beans or roasted carrots.
- Garlic butter pasta: Toss al dente noodles with minced garlic and parsley
- Smashed potatoes: Leave skins on for texture; top with chives
- Crispy green beans: Blanch first, then pan-fry with almond slices
“A buttery Chardonnay cuts through the richness of cheese-topped dishes, while Pinot Grigio complements herbaceous notes.”
Light and Low-Carb Options
For healthier alternatives, focus on fresh vegetables and lean proteins. A crisp Caesar salad with homemade dressing makes a refreshing side. Roasted Brussels sprouts or zucchini noodles also work well.
| Option | Prep Tip | Pairing |
|---|---|---|
| Roasted vegetables | Toss with olive oil and rosemary | Lemon vinaigrette |
| Spinach salad | Add walnuts and goat cheese | Balsamic glaze |
| Grilled asparagus | Finish with lemon zest | Parmesan shavings |
Present your dish on warm plates for professional results. Garnish with fresh herbs for color. Leftovers? Transform them into next-day salads or crusty bread sandwiches.
Dietary note: For gluten-free versions, use almond flour instead of panko. Keto adapters can substitute cauliflower mash for mashed potatoes.
Conclusion
Bring the steakhouse experience to your table with this easy-to-make dish. For best results, use freshly grated cheese and a meat thermometer to ensure perfect doneness. Don’t hesitate to tweak the copycat recipe—add herbs or swap cheeses to match your taste.
Store leftovers in the fridge for up to 3 days or freeze for 3 months. Reheat in the oven to keep the crust crispy. Share your creations online and tag us—we’d love to see your twist!
Ready for more? Explore our recipe collection to upgrade your home dinner game. Happy cooking!
FAQ
What makes the parmesan crust so crispy?
Can I use a different type of cheese for the crust?
How long should I marinate the chicken breasts?
What sides pair best with this dish?
Can I prepare this recipe ahead of time?
Is there a substitute for ranch dressing in the marinade?
What’s the ideal internal temperature for cooked chicken?
Can I make this recipe gluten-free?
For more cooking tips, stay connected with us. We also recommend the cookbook Skinnytaste Simple: Easy, Healthy Recipes with 7 Ingredients or Fewer
For more Recipes about Chicken